Create new release pipeline #
New pipeline #
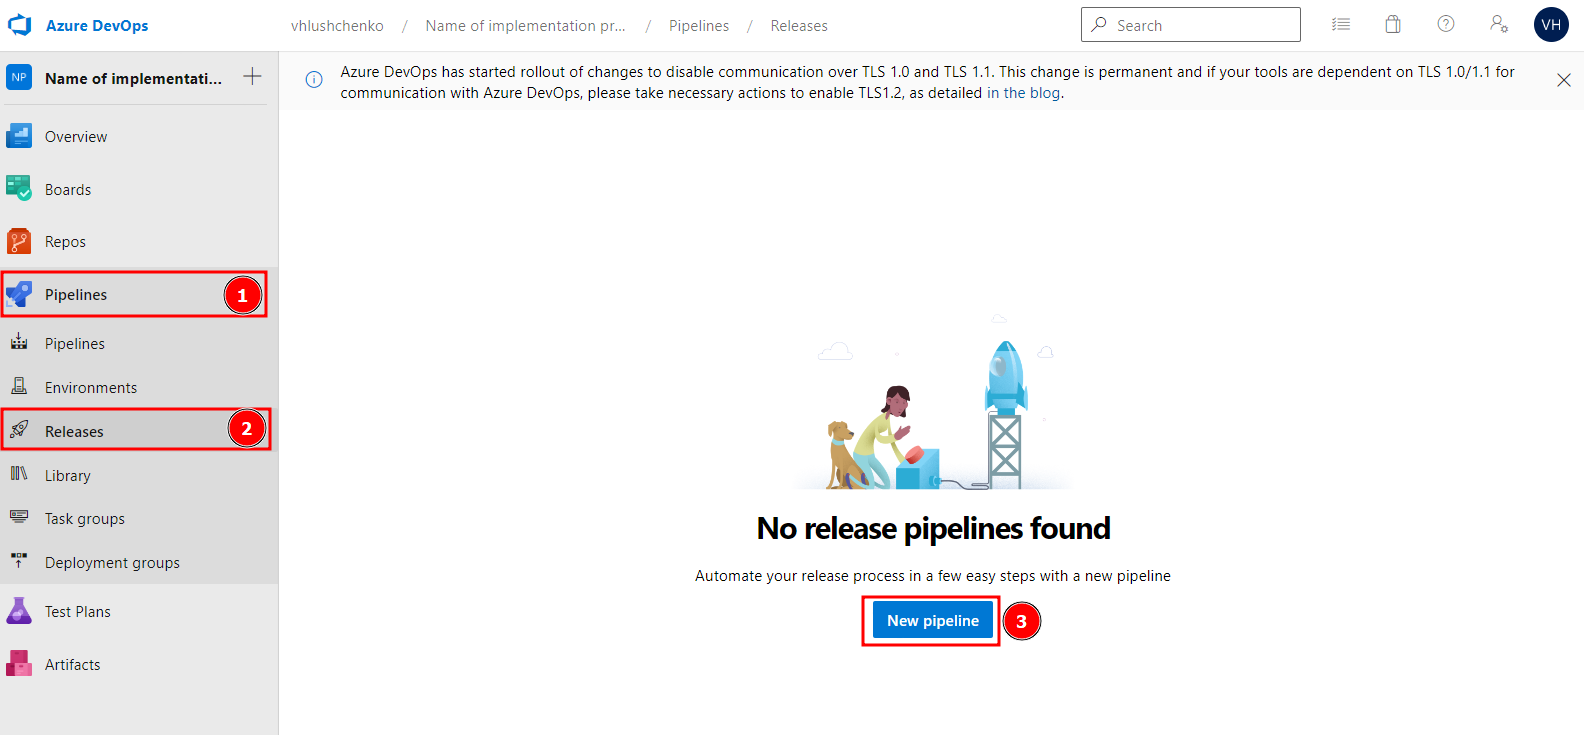
Select empty job #
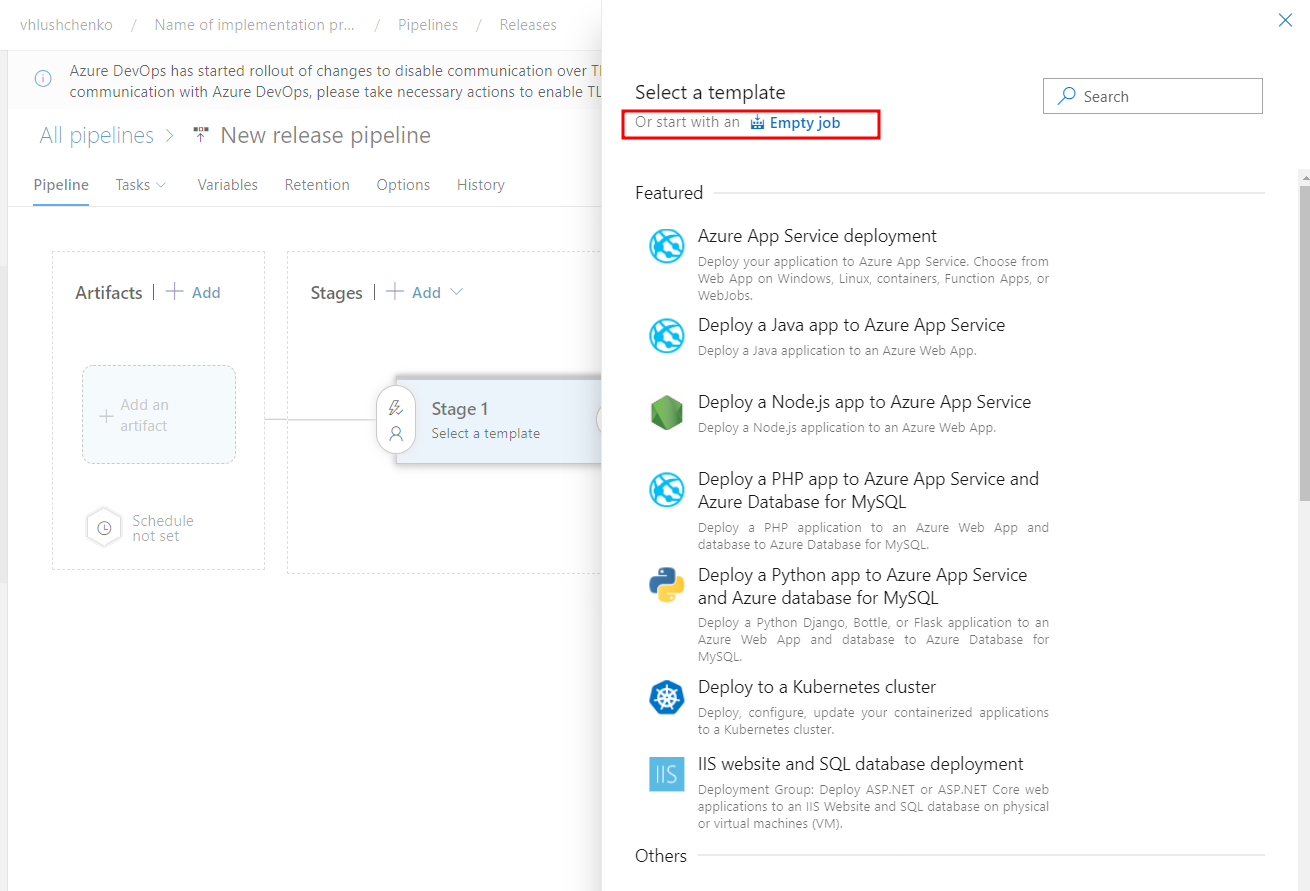
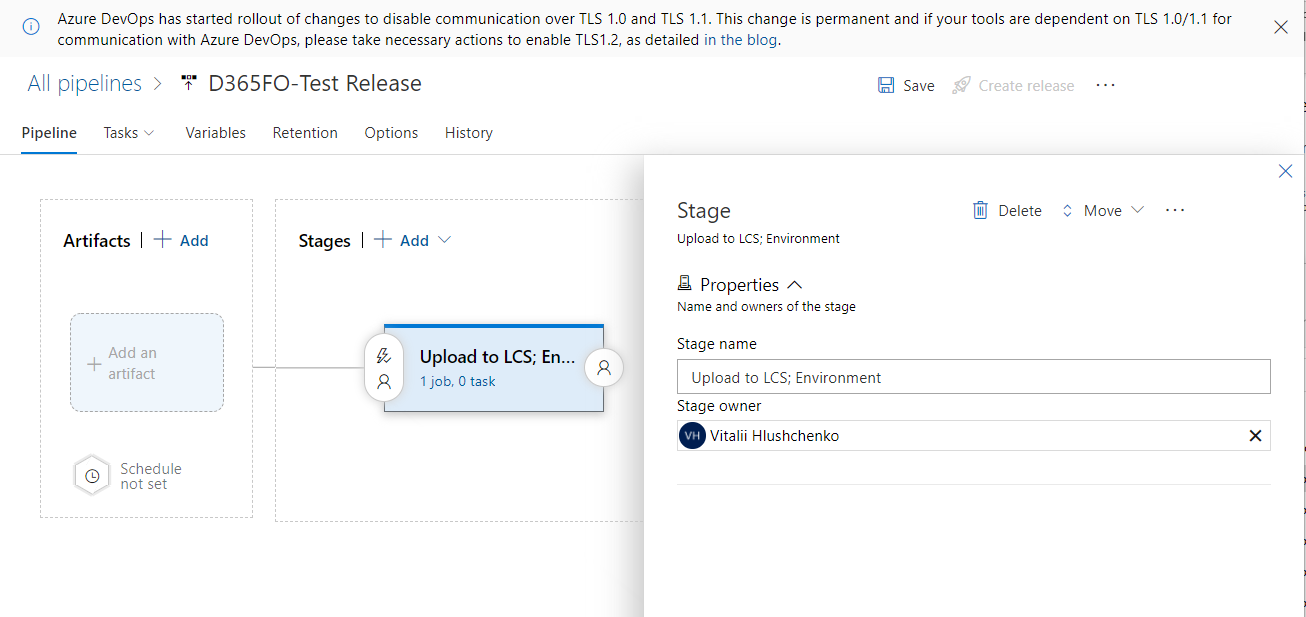
Setup release Pipeline name and Stage name #
Add artifact #
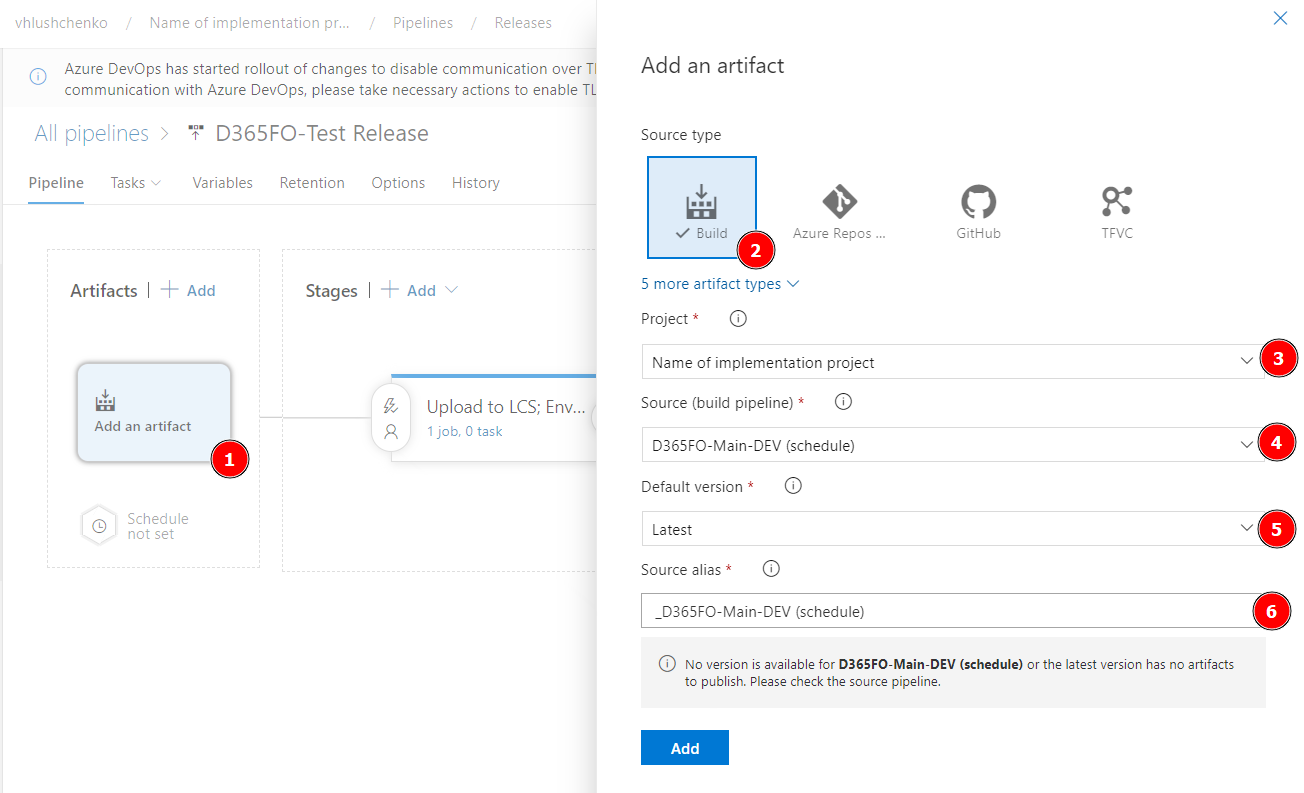
- (1) - Click on
Add an artifact - (2) - Select
Build - (3) - Select project name
- (4) - select build pipeline name
- (5) - Latest
- (6) - It fill by default
Continuous deployment trigger #
Select it if you want to run release automatically after Build pipeline finish work

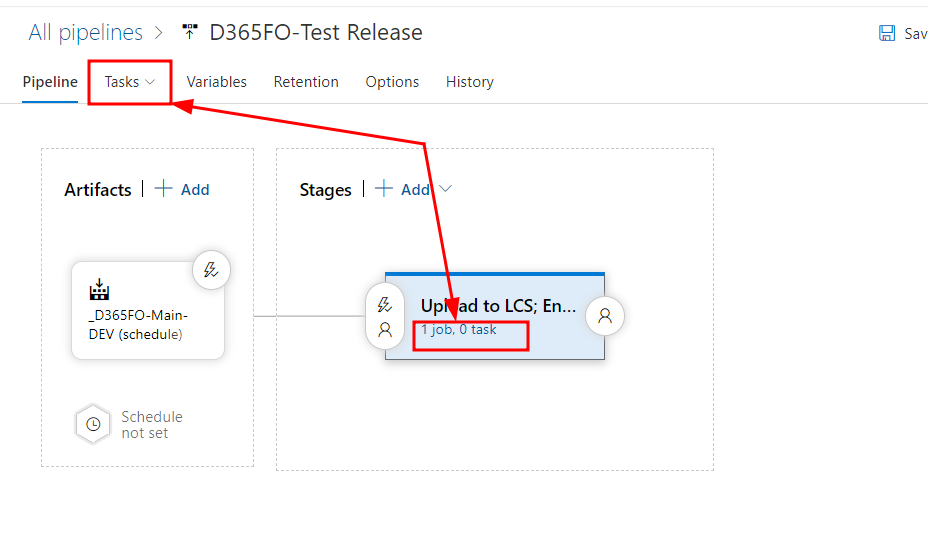
Job agent tasks #
Select tasks
Agent job property #
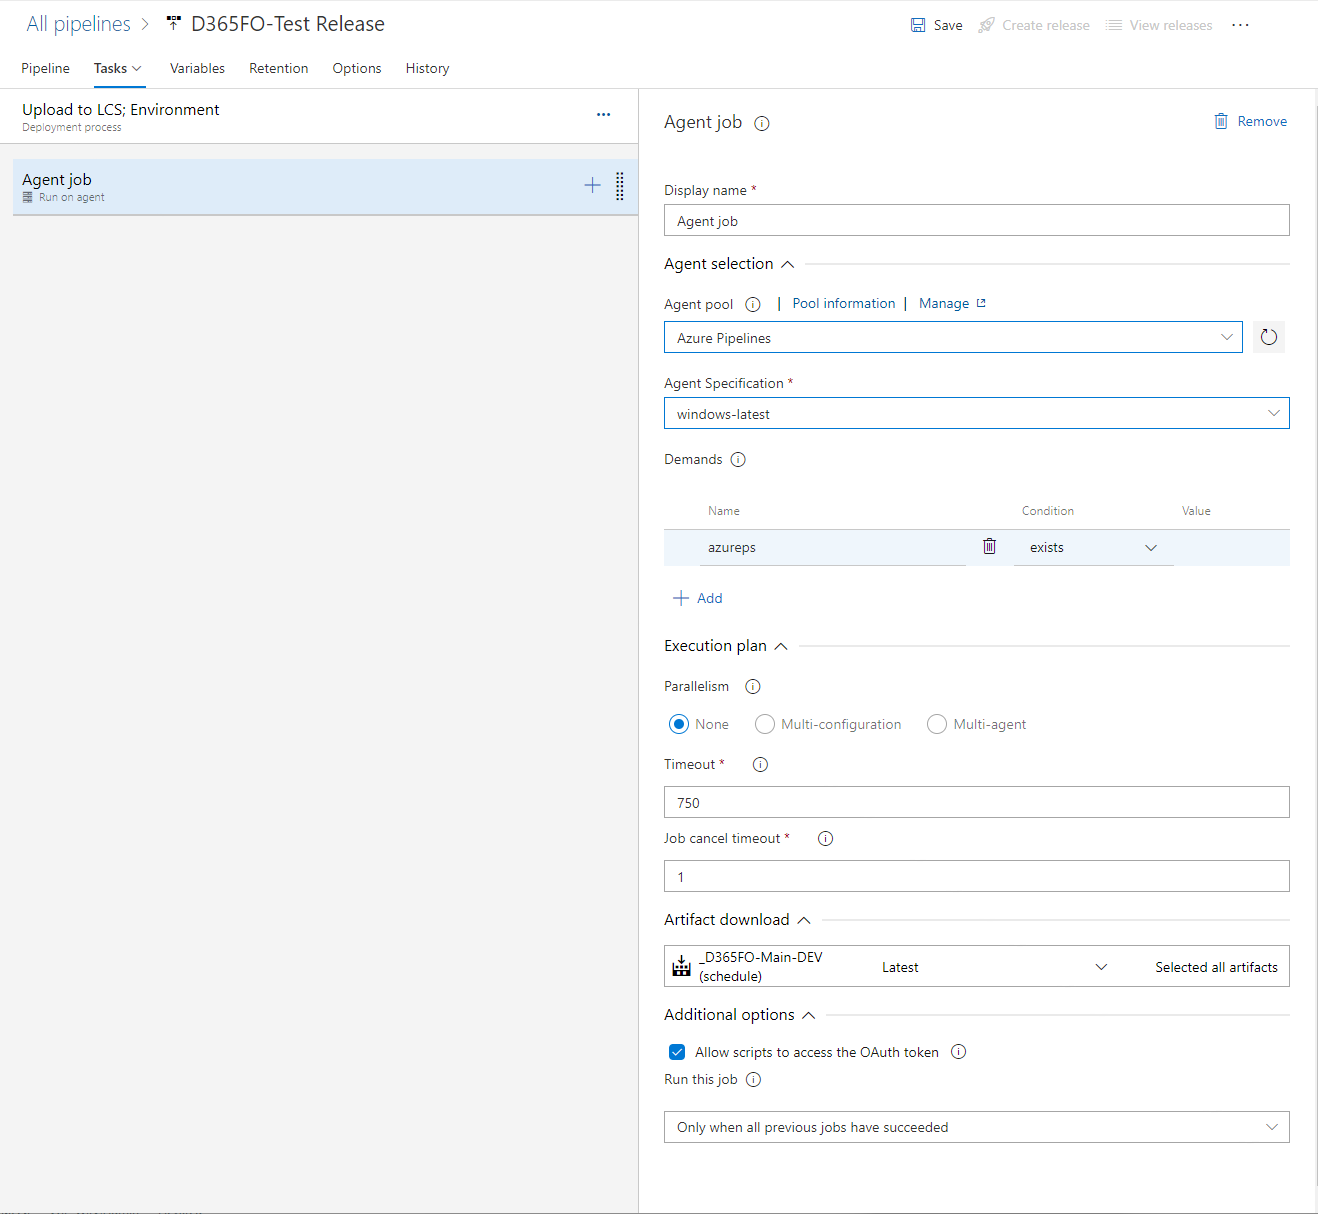
- Display name =
Agent job - Agent pool =
Azure Pipelinesand Agent Specification =windows-latest, Demands\Name =azureps, condition =exists. If we want to run pipe line on client managed VM - select Agent pool =Default - Parallelism =
None - Timeout =
720 - Allow scripts to access the OAuth token = True
- Run this job =
Only when all previous jobs have succeeded
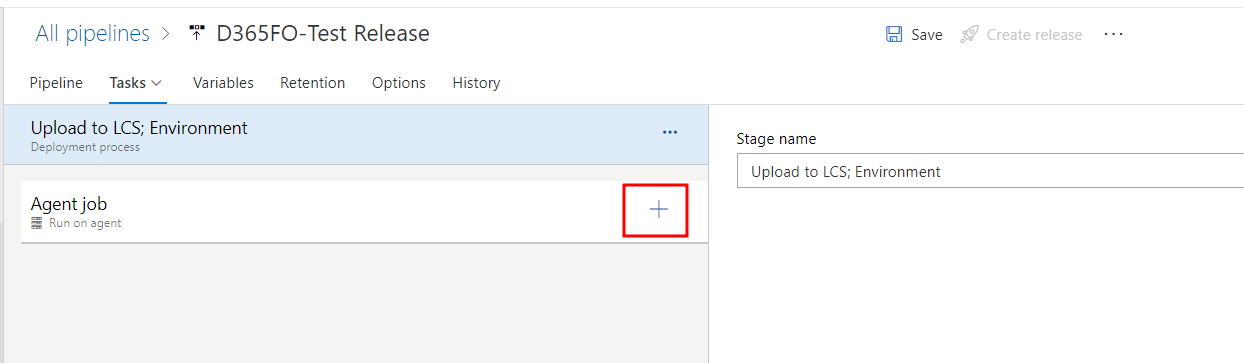
Press “+” button
Read release note file #
Add Powershell script with propertyes
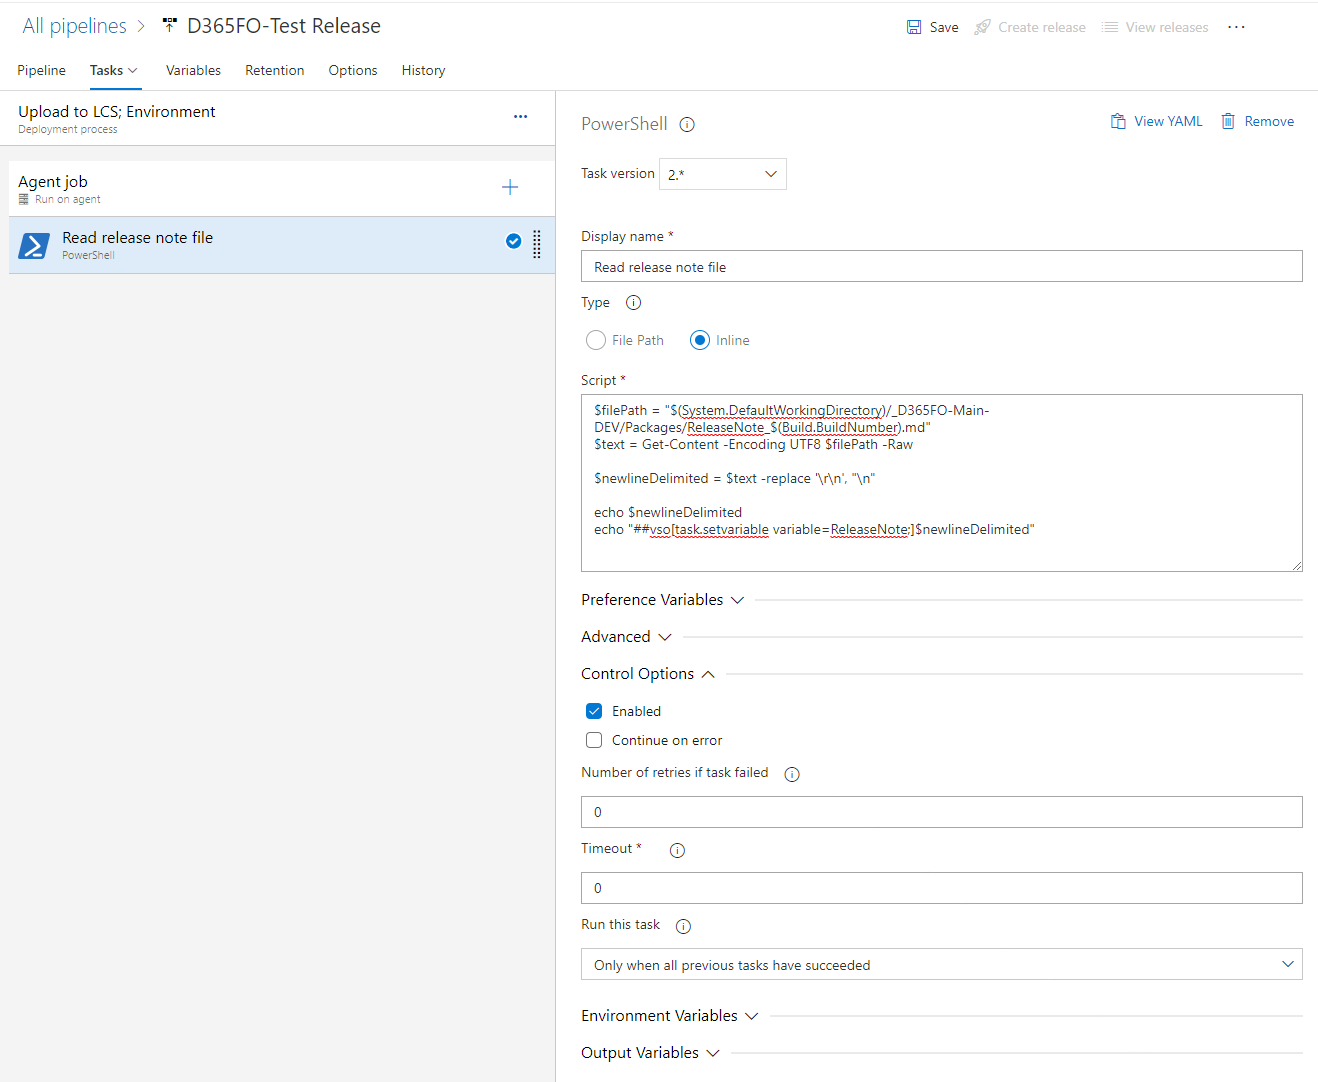
- Display name =
Read release note file - Type\Inline =
$filePath = "$(System.DefaultWorkingDirectory)/_D365FO-Main-DEV/Packages/ReleaseNote_$(Build.BuildNumber).txt"
$text = Get-Content -Encoding UTF8 $filePath -Raw

$newlineDelimited = $text -replace '\r\n', "\n"

echo $newlineDelimited
echo "##vso[task.setvariable variable=ReleaseNote;]$newlineDelimited"
value $filePath = "$(System.DefaultWorkingDirectory)/_D365FO-Main-DEV can be taken from Agent Job - Artifact download section
- Control Options\Enabled = True
Cut release note to 1000 symbols #
Add Powershell script with propertyes
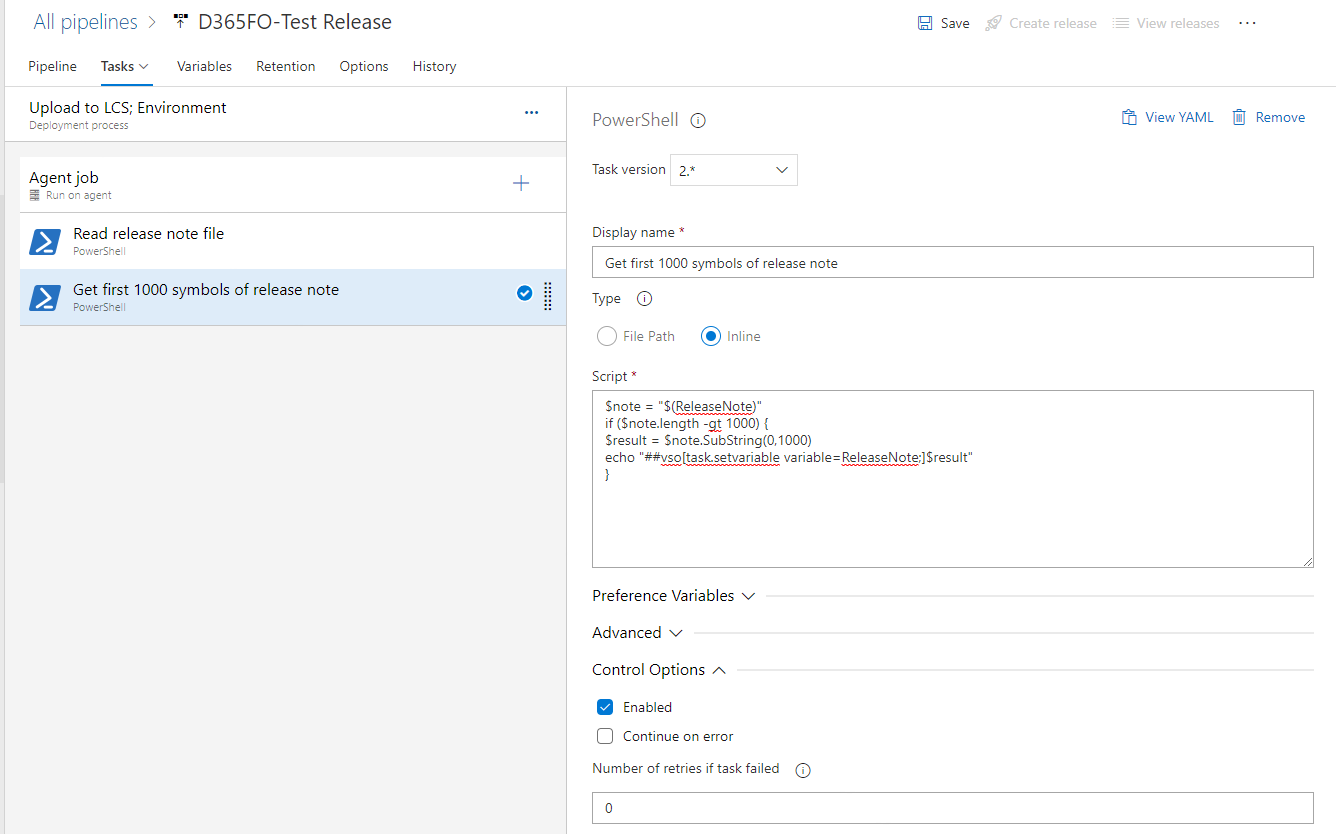
- Display name =
Get first 1000 symbols of release note - Type\Inline =
$note = "$(ReleaseNote)"
if ($note.length -gt 1000) {
$result = $note.SubString(0,1000)
echo "##vso[task.setvariable variable=ReleaseNote;]$result"
}
- Control Options\Enabled = True
Install MSAL.PS to enable authentication #
Add Install MSAL.PS to enable authentication script with propertyes. This step necessary if we want to upload package to the LCS and deploy it to target environment
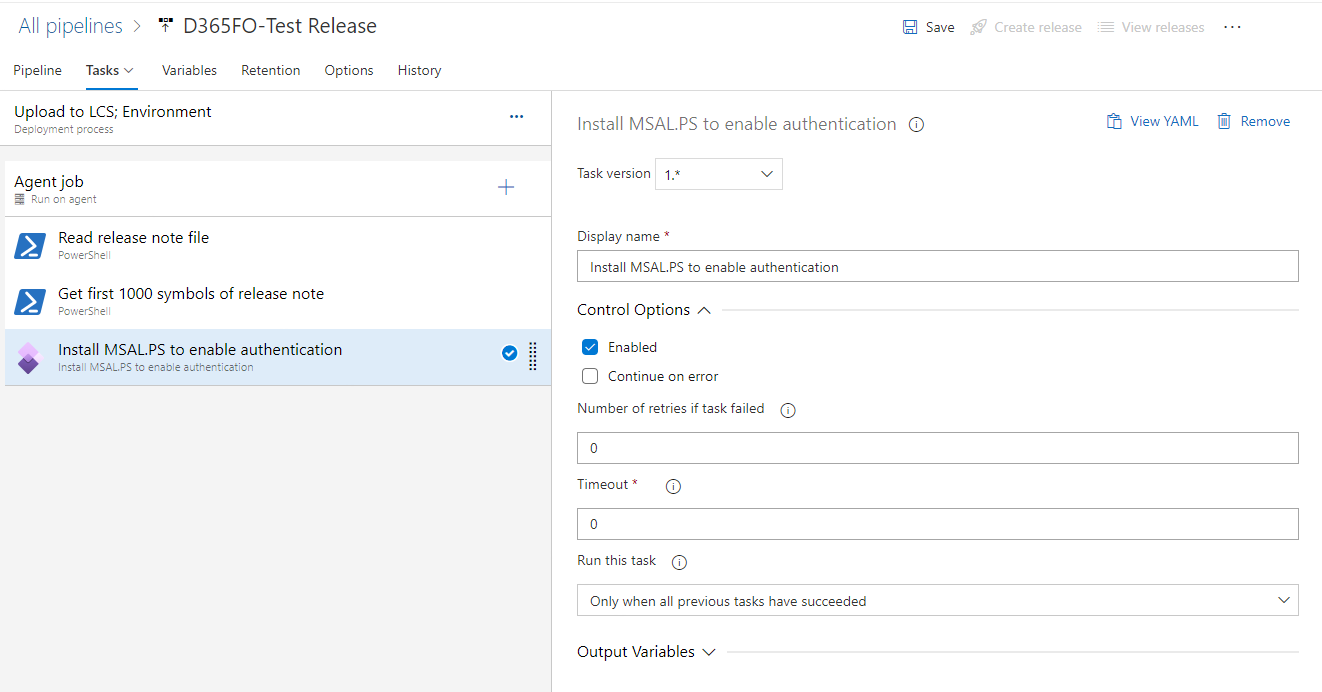
- Display name =
Install MSAL.PS to enable authentication - Control Options\Enabled = True
Install MSAL.PS to enable authentication #
Add Install MSAL.PS to enable authentication script with propertyes. This step necessary if we want to upload package to the LCS and deploy it to target environment
- Display name =
Install MSAL.PS to enable authentication - Control Options\Enabled = True
LCS Upload to Asset library #
Add Dynamics Lifecycle Services (LCS) Asset Upload script with propertyes.
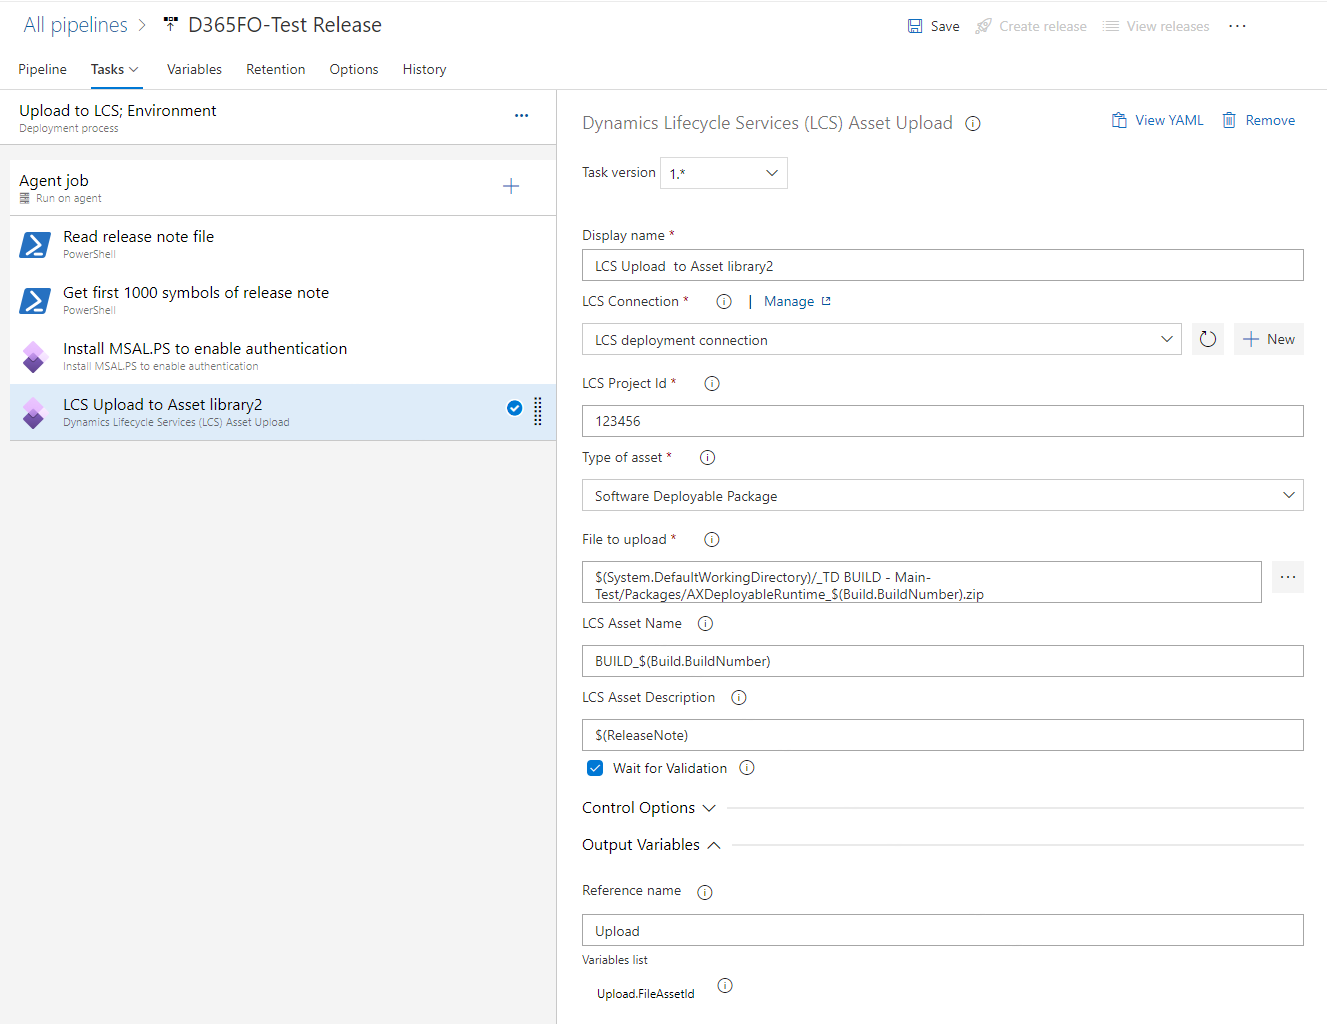
- Display name =
LCS Upload to Asset library - LCS Connection =
LCS deployment connection. Please find how to create new connection here - LCS Project Id = Project ID in LCS.
- Type of asset =
Software Deployable Package - File to upload =
$(System.DefaultWorkingDirectory)/_D365FO-Main-DEV/Packages/AXDeployableRuntime_$(Build.BuildNumber).zip - LCS Asset Name =
XXX_$(Build.BuildNumber), where XXX = TEST/UAT/PROD …. - LCS Asset Description =
$(ReleaseNote) - Wait for Validation = True
- Control Options\Enabled = True
- Reference name =
Upload
Deploy to environment #
This step can be split to separate stage with approvement before deploy to target env. In this case we should transfer few variables to the new stage.
Add Dynamics Lifecycle Services (LCS) Asset Deployment script with propertyes.
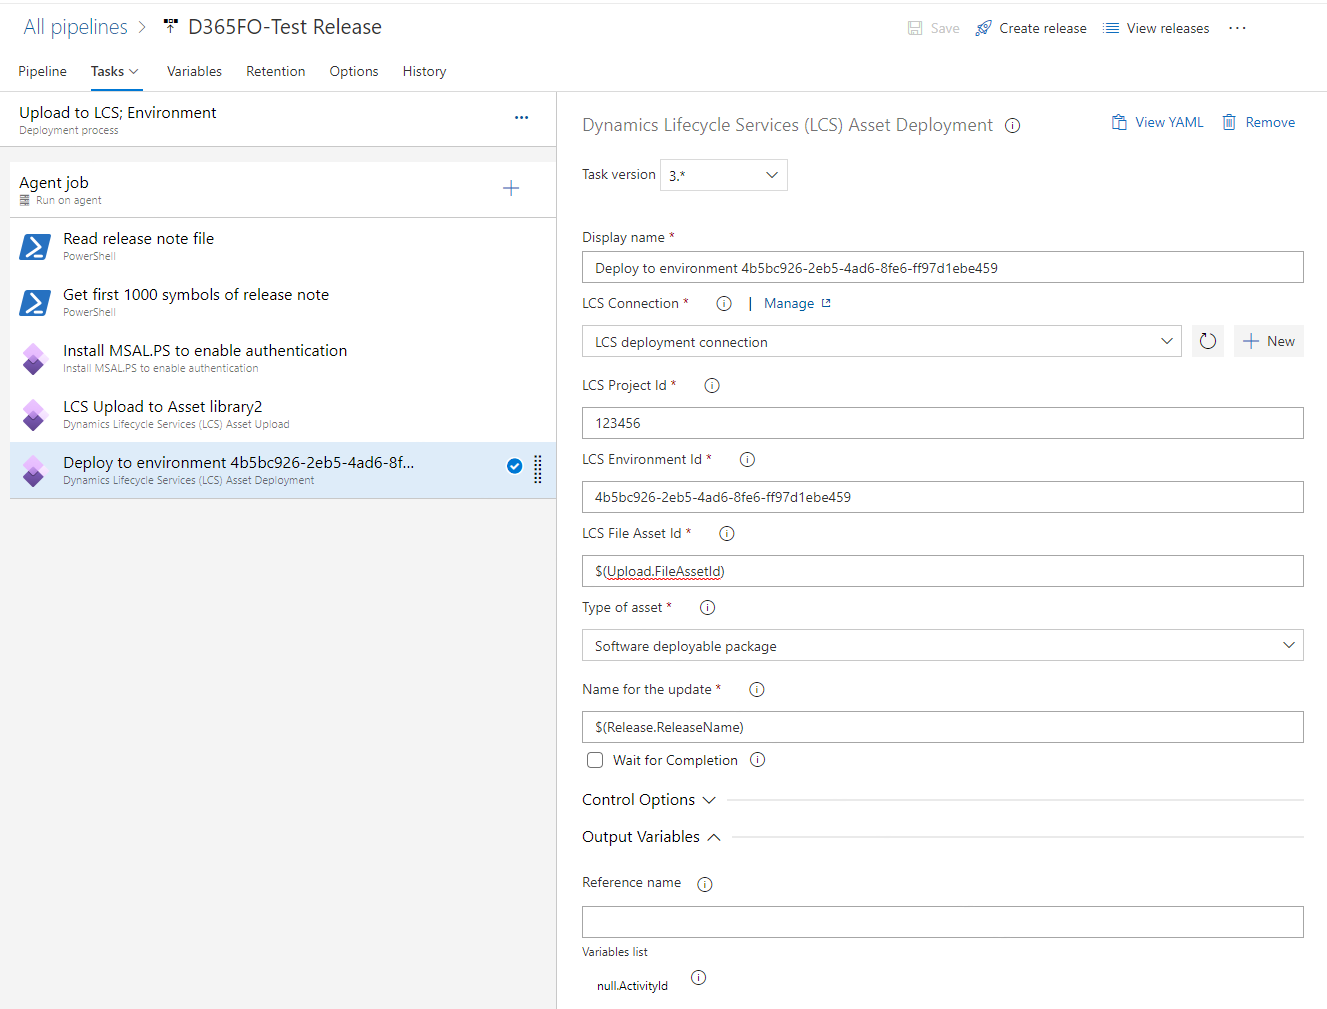
- Display name =
Deploy to environment - LCS Connection =
LCS deployment connection. Please find how to create new connection here - LCS Project Id = Project ID in LCS.
- LCS Environment Id = environment Id from LCS
- LCS File Asset Id =
$(Upload.FileAssetId). This is reference name from previous step - Type of asset =
Software Deployable Package - Name for the update =
$(Release.ReleaseName) - Wait for Validation = FALSE (this step is going about 1h-4h)
- Control Options\Enabled = True
Approval process and split upload to LCS and deploy to target env #
Upload and deploy can be split for many different reasons. It can looks like:
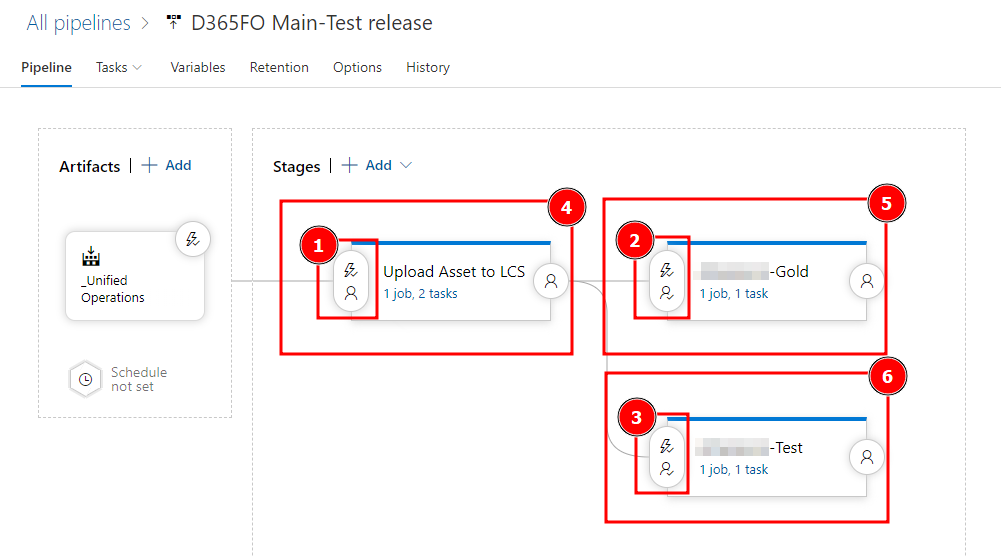
Where 1,2,3 - Points where we can setup different approval logic.
4 - Upload to LCS, 5,6 - deploy to target environment.
In this case Upload stage has step to populate variables for next steps. Add variable to Pipeline variables like LCSAsset
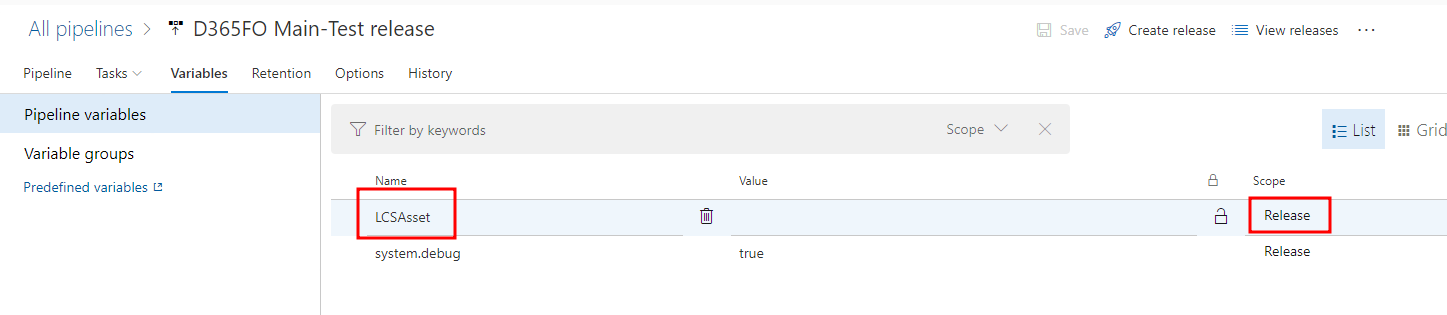
And setup Inline powershell step
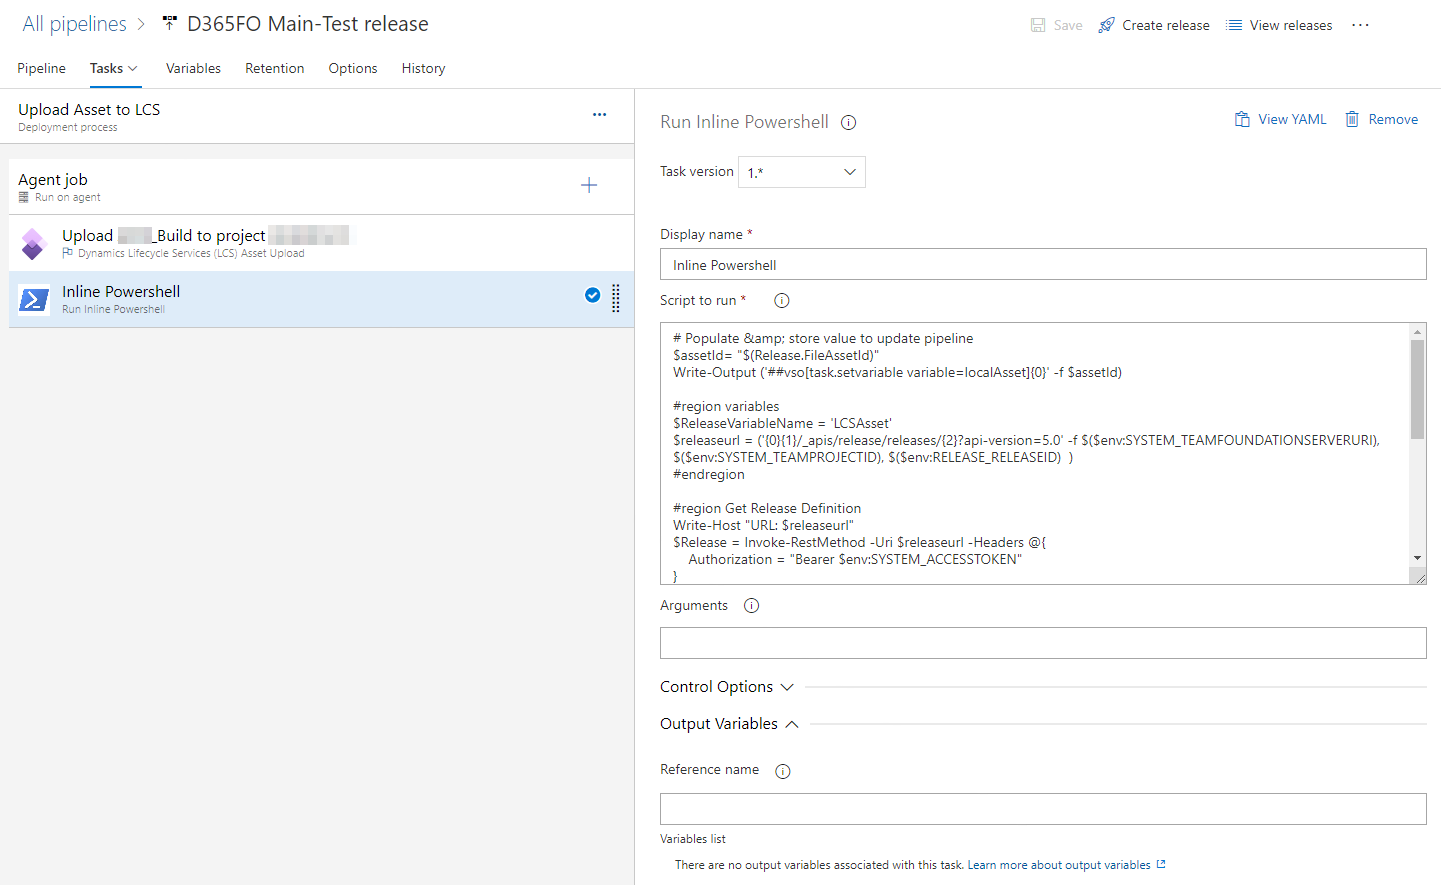
- Powerhell script type
Run Inline Powershell - Display name =
Inline Powershell - Script to run =
# Populate & store value to update pipeline
$assetId= "$(Release.FileAssetId)"
Write-Output ('##vso[task.setvariable variable=localAsset]{0}' -f $assetId)

#region variables
$ReleaseVariableName = 'LCSAsset'
$releaseurl = ('{0}{1}/_apis/release/releases/{2}?api-version=5.0' -f $($env:SYSTEM_TEAMFOUNDATIONSERVERURI), $($env:SYSTEM_TEAMPROJECTID), $($env:RELEASE_RELEASEID)  )
#endregion

#region Get Release Definition
Write-Host "URL: $releaseurl"
$Release = Invoke-RestMethod -Uri $releaseurl -Headers @{
    Authorization = "Bearer $env:SYSTEM_ACCESSTOKEN"
}
And we can use variable LCSAsset on the next stage - step Dynamics Lifecycle Services (LCS) Asset Deployment, property LCS File Asset Id = $(LCSAsset)